Hibiscus Flower Drawing: How To Sketch 5 Perfect Petals Step-by-Step
Ready to learn how to draw hibiscus flowers? This guide is perfect for both beginners and those looking to improve their skills. It turns the beauty of these tropical flowers into easy steps.
At first, drawing hibiscus flowers might seem hard. But, with the right techniques, it’s actually quite simple. Each petal has its own story of curves and colors. Start your journey to create beautiful botanical art here, with a step-by-step guide.
This guide will help you capture the beauty of these tropical flowers. You’ll learn about their structure and details. With each stroke, you’ll become more confident in your drawing skills.
Key Takeaways
- Learn the fundamental techniques of hibiscus flower drawing
- Break down complex flower shapes into simple geometric forms
- Understand the unique characteristics of tropical flower structures
- Develop skills for creating realistic and dynamic flower sketches
- Gain confidence in your artistic abilities through step-by-step guidance
Why Drawing Hibiscus Flowers Is Easier Than You Think

Feeling nervous about drawing flowers? Relax! Hibiscus flowers are perfect for beginners. They are easy to draw, even for those just starting.
So, why are hibiscus flowers great for beginners? They have unique features that make drawing them simple:
- Bold, clear shapes that are easy to replicate
- Only five primary petals to sketch
- Natural, forgiving curves that don’t require perfect symmetry
- Distinctive center that helps guide your composition
When drawing a hibiscus, remember that mistakes are okay. Real flowers aren’t perfect. They have natural, unique shapes that make each drawing special.
| Drawing Challenge | Hibiscus Advantage |
|---|---|
| Complex Petal Structure | Simple 5-petal design |
| Symmetry Pressure | Natural asymmetry welcomed |
| Detailed Linework | Soft, flowing curves |
By breaking down the flower into basic shapes like circles and teardrops, you’ll find it easier to draw. Your confidence will grow with each stroke. The hibiscus is a great choice for beginners.
Essential Tools and Supplies for Your Hibiscus Flower Drawing
Starting your hibiscus flower drawing doesn’t need a big spend on supplies. Whether you’re new or skilled, the right tools can really help. They bring your flower art to life.
Traditional Drawing Materials for Beginners
Beginners need just a few basic tools:
- Sketching pencils (3H for light lines, HB for shading)
- High-quality drawing paper
- Eraser
- Blending stump

| Pencil Type | Best Use | Recommended Brand |
|---|---|---|
| Graphite Pencils | Initial Sketch | Derwent Chromaflow |
| Colored Pencils | Color Details | Prismacolor Premier |
| Markers | Vibrant Color Layers | Ohuhu Honolulu Markers |
Digital Drawing Tablets and Software Options
Digital artists have new tools:
- Xencelabs Pen Tablets with advanced pressure sensitivity
- Professional software like Adobe Photoshop and Procreate
- Graphic tablets with customizable shortcut keys
Your choice of tools depends on your skill and vision. Start simple, practice often, and see your hibiscus drawings grow!
Understanding the Anatomy of a Hibiscus Flower Before You Sketch
Before you start drawing a hibiscus flower, it’s key to know its structure. The hibiscus flower’s anatomy is a treasure trove for artists wanting to draw its beauty. Let’s explore the main parts that make this flower so special.

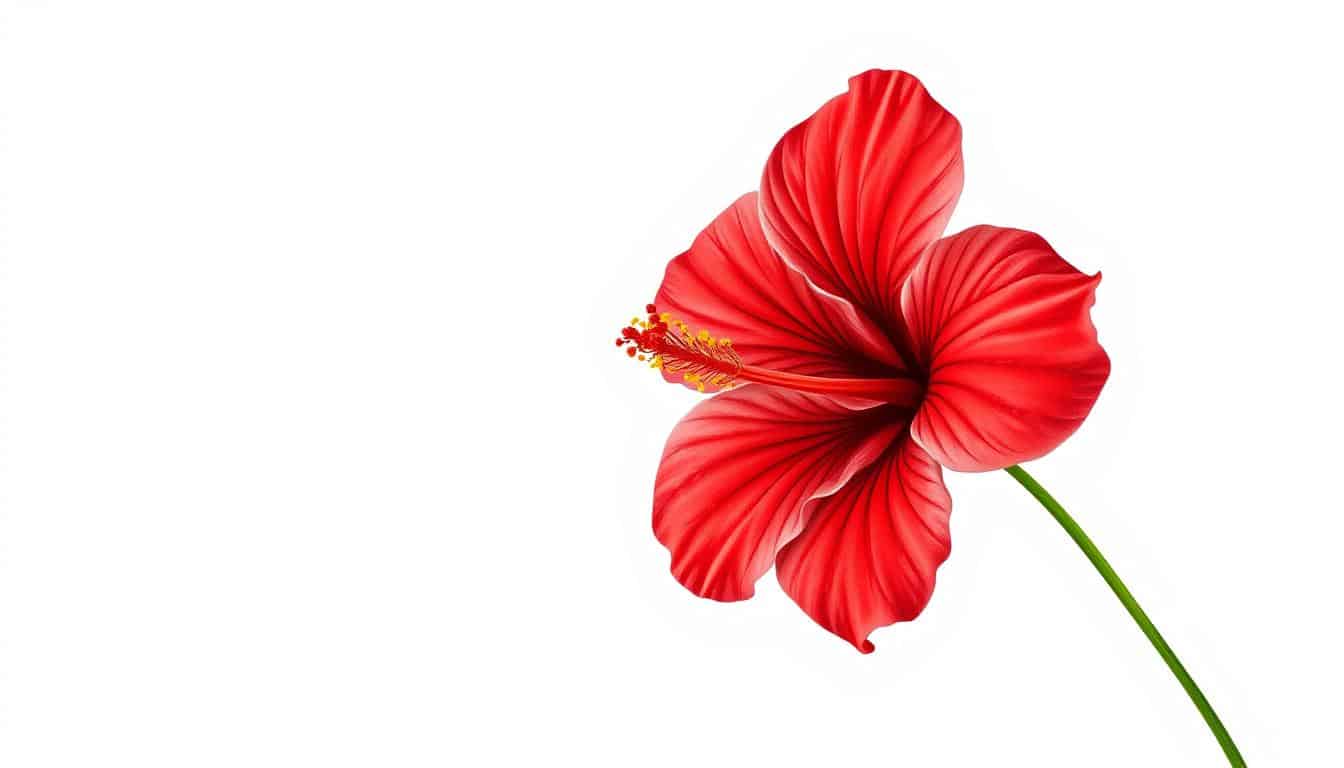
The hibiscus petals are the flower’s main attraction. They form a unique pentagonal shape with five large, overlapping petals. These petals are not flat or stiff. They have soft, natural curves with subtle ruffles and waves, adding to the flower’s dynamic look.
- Five distinct petals in a star-like arrangement
- Soft, wavy edges with natural folds
- Slight texture that catches light beautifully
At the flower’s center, the stamen is the most striking feature. It’s a long, slightly curved structure with a pod-like tip and tiny anthers. The pistil is also key, playing a big role in the flower’s reproductive process and adding depth to your sketch.
Remember the leaves around your hibiscus flower. They’re big and have unique features:
- Jagged, serrated edges
- Prominent central vein
- Distinct lobed shape
Knowing these flower parts will turn your simple sketch into a detailed, lifelike drawing. It will truly capture the hibiscus flower’s essence.
Creating Your Initial Light Sketch with Basic Shapes
Starting your hibiscus flower drawing is all about mastering the light sketch technique. This first step is key to a beautiful artwork. Breaking it down into basic shapes makes it easier.
- Use a soft 3H pencil with minimal pressure
- Create loose, fluid lines that can be easily adjusted
- Focus on capturing overall form rather than minute details
Mapping Out the Flower Center and Petal Placement
Start by sketching a small circle in the center of your page. This circle is the anchor for your hibiscus flower. Around it, lightly outline five petal shapes with gentle, sweeping curves.
Key tips for petal placement:
- Imagine the petals radiating from the center like a star
- Keep initial lines soft and tentative
- Vary the petal sizes slightly for a natural look
Adding the Stem and Leaf Outlines
With your flower center set, draw a gentle line down for the stem. Sketch basic leaf shapes with simple curved lines. Remember, these initial lines are just a guide. Don’t worry about perfection—focus on capturing the flower’s overall essence and movement.
Refining Your Hibiscus Sketch with Detailed Outlines

Now that you’ve made your first sketch, it’s time to refine the outlines. This step turns your basic shapes into a stunning hibiscus flower drawing. You’ll see clean lines and detailed petal work.
Begin by tracing over your original sketch carefully. Aim for smooth, confident strokes that show off the hibiscus petals’ unique look. These flowers have a wavy, ruffled shape. So, your sketch should reflect their natural flow.
- Trace over initial lines with more defined edges
- Emphasize the natural curves of each petal
- Add subtle wave-like details to create depth
Don’t forget the flower’s center. Sketch the stamen with a curved line, adding small tips and dots for anthers. For the leaves, use jagged edges to give it a real botanical look.
Digital artists can use a new layer to trace over their sketch. Traditional artists should use light strokes to refine without losing the original’s feel.
Your aim is to make a clean, detailed outline. This will prepare your hibiscus for shading and coloring. Take your time here – it’s where your hibiscus will truly shine!
Mastering Shading Techniques for Realistic Petals and Leaves
To turn a simple sketch into a lifelike hibiscus drawing, you need to master shading techniques. Pencil shading is key. It adds depth and dimension, making your artwork stand out.
Creating realistic petals means understanding how light affects the flower’s surface. Your shading method will make your hibiscus look three-dimensional and vibrant.
Building Base Tones on Petals
Begin by setting base tones. Use these techniques:
- Hold your pencil at a 45-degree angle for soft gradients
- Apply lighter pressure near petal edges
- Gradually increase pressure toward the petal base
- Use the side of your pencil for smooth, even coverage
Creating Depth with Layered Shading
Depth turns a flat drawing into a realistic one. Your shading makes each petal look three-dimensional and textured.
- Observe how light hits the hibiscus petals
- Start with a light base layer
- Build up darker tones gradually
- Use an eraser to lift highlights and create subtle variations
Pro tip: The secret to realistic petals is subtle tone variation. Don’t hesitate to try different pencil pressures and layering methods.
Adding Color to Your Hibiscus Flower Drawing
Bringing your hibiscus flower drawing to life starts with coloring. You need to know how to use color well. This turns your simple sketch into a colorful masterpiece.
Choosing between traditional and digital coloring is key. Alcohol markers and colored pencils are great for flowers. They each have special benefits:
- Alcohol Markers: Perfect for smooth, blendable colors
- Colored Pencils: Great for detailed layering and texture
- Digital Tools: Offer unlimited color experimentation
Blending colors is an art. Start with light shades and add darker ones gradually. This avoids muddy colors and adds depth.
| Coloring Method | Best For | Technique |
|---|---|---|
| Alcohol Markers | Smooth Gradients | Layer from light to dark |
| Colored Pencils | Detailed Textures | Build layers with varying pressure |
| Digital Coloring | Unlimited Experiments | Use blending modes and brushes |
For hibiscus flowers, try bright colors. Pink, red, and coral tones are perfect. They bring out the flower’s tropical feel. Add slight color changes for depth and interest.
Getting better at coloring flowers takes practice. Don’t hesitate to try new things and find your own style!
Common Mistakes to Avoid When Drawing Hibiscus Flowers
Improving flower drawings means knowing and avoiding common mistakes. Artists often find it hard to capture the delicate look of hibiscus flowers. But, knowing these challenges can help you get better at drawing.
When drawing hibiscus flowers, beginners often make specific mistakes. These errors can make their drawings look less real and less vibrant. Spotting these mistakes is the first step to making your flower drawings more authentic and lively.
Stiff and Symmetrical Petal Challenges
One big mistake is making petals too uniform. Real hibiscus flowers have natural variations that make them look alive. To avoid this in your drawings:
- Look at real hibiscus flower pictures
- Practice drawing petals that are a bit uneven
- Use loose, flowing hand movements while drawing
Addressing Shading and Dimension Issues
Flat shading can make your hibiscus drawing look flat and dull. To make your drawings more three-dimensional and lively:
| Shading Problem | Solution |
|---|---|
| Flat, uniform color | Create gradual color transitions |
| Lack of depth | Study light source and shadow placement |
| Rigid petal edges | Use softer pencil strokes and blending techniques |
By practicing these tips, you can make your hibiscus flower drawings come to life. Remember, every drawing is a chance to learn and get better at your art.
Finishing Touches and Final Details for Your Flower Bud
As you near the end of your artwork, the final touches can make a big difference. These details can turn a good drawing into an outstanding one. It’s all about paying attention to the small things.
Your drawing should show a tightly closed flower bud. Start by drawing the bud as a small teardrop near the stem. Use soft shading to add depth and dimension.
- Shade one side more heavily to suggest roundness
- Add a subtle shadow where the bud connects to the stem
- Use curved lines to hint at layered textures
To add a professional touch, use pencils:
- White pencil highlights:
- Create delicate ridges on petals
- Add soft highlights along stem edges
- Enhance surface texture
- Black pencil shadows:
- Add fine lines in flower center
- Deepen shadows on leaf tips
- Increase overall drawing contrast
When adding the final touches, remember to be careful. Step back often to check how each detail looks. Not every part needs extra details. Sometimes, simplicity is what makes an artwork stand out.
Conclusion
Your hibiscus flower drawing is more than just lines on paper. It shows your growth in artistic expression and floral illustration. Whether it turned out as planned or not, you’ve made a big step in your drawing journey.
Every stroke and shading technique you’ve learned is part of your unique toolkit. Even the imperfect drawings are valuable. They help you grow in your art journey. Each time you draw, you get better at observing and expressing yourself.
Art isn’t about making perfect pictures. It’s about expressing yourself and enjoying the learning process. Your hibiscus drawing is a moment of artistic exploration. You’ve tried to capture a flower’s beauty through your own eyes.
Keep practicing and trying new things. Most importantly, have fun with your art. Your skills will grow as you stay curious and open to learning. Drawing is full of possibilities, and your hibiscus flower is just the start of a great adventure.